I love fall. There's something about the blustery days, the colors, the cinnamon adorned smells wafting throughout the house. Everything is just cozy and happy.
I love utilizing all the seasonal goodies Mother Earth has to offer! For my momma's birthday I decided instead of just a plain ole cake, I'd "fall" it up this year, especially since her birthday is in October.
Pumpkin-Cream Cheese Crepe Cake with granola
Crepe Batter:
1 1/2 c flour
1 c almond milk
1/4 c sugar
1 large egg
1 tsp vanilla
1/4 c oil
Filling:
4 Tbsp cream cheese
1 drop clove essential oil
1 stop cinnamon bark essential oil
1 drop cardamom essential oil
1 c pumpkin butter
1/2 c granola
Pull cream cheese out of fridge. Make your batter, start with dry and add in wet. Mix until batter is smooth. Set aside for 30 minutes, helps make batter from becoming rubbery. Take the cream cheese and drop in essential oils. Mix until smooth and easy to spread. Once batter has rested, make crepes. Heat non stick pan on high heat, spray pan and pour in about 1/3 c of batter. Turn pan in a circle, dipping each side to let crepe batter reach the entire bottom. When sides brown (about 2 minutes), gently slide the spatula under the crepe's edge and flip over. Batter should make about 16 crepes.
Let crepes cool for about 10 minutes. Then take a crepe, place it on your serving plate, spread with pumpkin butter, put another crepe on top, spread with spiced cream cheese, sprinkle with granola, and continue layering until all crepes are used. If you have torn crepes, no worries, put them in the middle. On the top add layer of spiced cream cheese, pumpkin butter and the rest of the granola. I added a few fall colored flowers to brighten up the plate. Refrigerate until ready to serve. You can serve with homemade whipped cream, ice cream or just eat it on it's own. Yum!
A few days later I made dinner for a friend who had just had her second baby girl. I was so grateful for all the people who made us meals both times I had my girls.
Italian Pasta Bake with Meatballs
Meatballs
Elbow noodles
1 jar sauce
1 can diced tomatoes
2 c chicken broth
1 drop oregano essential oil
1 drop basil essential oil
Salt & pepper
1 c cheese
I used frozen meatballs (A few shortcuts today folks!) Heat broth & sauce, pour in noodles. Add tomatoes & essential oils. Let cook for 10-15 minutes. Remove from pot, spread out in pan. Add meatballs & cheese on top. Bake at 375 for 15 minutes. Serve with salad or crusty bread.
Cinnamon-Orange Brownie Cake Balls
Brownie mix
1 drop orange essential oil
1 drop cinnamon essential oil
1/2 cup of Nutella
5 squares of bakes chocolate
Candy corn
Make brownies (I took a shortcut on this dessert.) After cooled from baking crumble into a bowl, add Nutella as a binder. Roll into 1 inch balls and set on baking sheet. Put in freezer to chill for 15 minutes. Melt chocolate, dip one brownie cake ball at a time into melted chocolate. Make sure they're all covered, place on baking sheet and top immediately with candy corn before the chocolate dries. Serve!
I love making most things homemade, but with two babies and an in-home daycare, sometimes I just work with what I got. I'm one resourceful mama who loves to cook and bake for the ones I love.
Cheers! Xo Lo
Friday, October 21, 2016

Friday, October 7, 2016
Best Girls Dinner
A few weeks ago I hosted an intimate dinner for some of my best local girls. Motherhood had brought beautiful chaos into all of our lives and it was so nice to just sip, chat, giggle and eat together...not just as busy moms, but as friends. I incorporated a fresh menu full of seasonal eats, sentimental details and my love for YoungLiving essential oils.
Menu:
Lemon-Tarragon Flatbread with Fontina and Prosciutto
Ingredients:
Flatbread dough (recipe below)
1 package of quality prosciutto
Whole milk ricotta
Quality fontina cheese
Lemon- Tarragon dressing
1 drop of lemon essential oil
You can make your dough or get already made pizza dough from your local grocery store. I mixed 3
1/2c flour with 1/2 tsp baking soda and 1 tsp salt. Then I slowly added 1 stick of room temp butter until incorporated. Add 10-12 Tbsp of water until dough forms. Knead for 5 minutes, cut into 4 discs and wrap up. Refrigerate for 30 minutes. When dough is ready, roll out to about 1/2 inch thickness. And grill each side on high heat for about 1-2 minutes. Let cool, spread with dressing. Mix lemon essential oil until ricotta and spoon on top of dough. Place prosciutto, sliced fontina and fresh basil leaves on top and serve. The whole milk ricotta is amazing, I would never use a low-fat ricotta. So delicious!
Pan Grilled Chicken with walnut and spinach pesto
Ingredients:
5 chicken thighs
2 c spinach
1/2 c walnuts
1/4 c olive oil
1/2 c Parmesan
1 piece of garlic
Salt
1 drop of black pepper essential oil
I love using chicken thighs because they are an inexpensive organic option and so flavorful! I made the pesto first by adding the spinach, olive oil and garlic into a food processor (or blender) pulse and then add in walnuts and Parmesan. Pulse until smooth. Add salt, pepper and black pepper essential oil; stir, set aside until serving. I grilled my chicken in a grill pan with olive oil, and salt. About 10 minutes or so per side. Serve with pesto on top.
Grilled Eggplant with Goat Cheese and Walnuts
Ingredients:
1-2 eggplants
Good quality goat cheese
1/4 c walnuts
Olive oil
Salt & pepper
1 drop of oregano essential oil
I drizzled my eggplant with olive oil and sprinkled with salt and pepper. Placed on the hot grill pan and grilled for about 3 minutes per side. Then I let cool slightly. Mix goat cheese with oregano essential oil and sprinkle on top with walnuts.
Artichokes and Tomato Panzanella
Ingredients:
1 jar of olive oil marinated artichokes
1 container of grape tomatoes
Leftover bread
1/3 c chicken broth
Olive oil
Salt & pepper
1 drop of basil essential oil
Let dried, leftover bread soak in chicken broth for a few minutes. Heat pan with olive oil and basil essential oil, add in tomatoes, artichokes and bread. Remove when bread a crisp yet still moist. Sprinkle with salt and pepper.
Grilled Pineapple served with ice cream and Nutella
Ingredients:
1 pineapple
1 c Nutella
2 scoops of vanilla ice cream per bowl
1 drop of orange essential oil
1 drop cinnamon essential oil
Slice up pineapple and grill each side for 2 minutes. Place in bowls on top of ice cream. Mix Nutella with drops of essential oil and drizzle over pineapple. Serve.
I love using fresh ingredients, essential oils, resourcefulness, creativity and love in my dishes. The girls brought wine and we happily ate and shared stories. At each friend's place mat I had a card and gift to mark their seat. I made a Epsom salt bath soak for each friend with various essential oils that I thought they'd love. Lavender for my busy working friend to help relax. Lemon for another friend for energy. Joy in another to uplift. Panaway to help sooth. Lemongrass for my bohemian traveling friend. I mixed them all with some coconut oil and painted the tops to make them personal. Special, unique details are the best.
Hope you enjoy these recipes as much as we did!
Xo Lo
Menu:
Lemon-Tarragon Flatbread with Fontina and Prosciutto
Ingredients:
Flatbread dough (recipe below)
1 package of quality prosciutto
Whole milk ricotta
Quality fontina cheese
Lemon- Tarragon dressing
1 drop of lemon essential oil
You can make your dough or get already made pizza dough from your local grocery store. I mixed 3
1/2c flour with 1/2 tsp baking soda and 1 tsp salt. Then I slowly added 1 stick of room temp butter until incorporated. Add 10-12 Tbsp of water until dough forms. Knead for 5 minutes, cut into 4 discs and wrap up. Refrigerate for 30 minutes. When dough is ready, roll out to about 1/2 inch thickness. And grill each side on high heat for about 1-2 minutes. Let cool, spread with dressing. Mix lemon essential oil until ricotta and spoon on top of dough. Place prosciutto, sliced fontina and fresh basil leaves on top and serve. The whole milk ricotta is amazing, I would never use a low-fat ricotta. So delicious!
Pan Grilled Chicken with walnut and spinach pesto
Ingredients:
5 chicken thighs
2 c spinach
1/2 c walnuts
1/4 c olive oil
1/2 c Parmesan
1 piece of garlic
Salt
1 drop of black pepper essential oil
I love using chicken thighs because they are an inexpensive organic option and so flavorful! I made the pesto first by adding the spinach, olive oil and garlic into a food processor (or blender) pulse and then add in walnuts and Parmesan. Pulse until smooth. Add salt, pepper and black pepper essential oil; stir, set aside until serving. I grilled my chicken in a grill pan with olive oil, and salt. About 10 minutes or so per side. Serve with pesto on top.
Grilled Eggplant with Goat Cheese and Walnuts
Ingredients:
1-2 eggplants
Good quality goat cheese
1/4 c walnuts
Olive oil
Salt & pepper
1 drop of oregano essential oil
I drizzled my eggplant with olive oil and sprinkled with salt and pepper. Placed on the hot grill pan and grilled for about 3 minutes per side. Then I let cool slightly. Mix goat cheese with oregano essential oil and sprinkle on top with walnuts.
Artichokes and Tomato Panzanella
Ingredients:
1 jar of olive oil marinated artichokes
1 container of grape tomatoes
Leftover bread
1/3 c chicken broth
Olive oil
Salt & pepper
1 drop of basil essential oil
Let dried, leftover bread soak in chicken broth for a few minutes. Heat pan with olive oil and basil essential oil, add in tomatoes, artichokes and bread. Remove when bread a crisp yet still moist. Sprinkle with salt and pepper.
Grilled Pineapple served with ice cream and Nutella
Ingredients:
1 pineapple
1 c Nutella
2 scoops of vanilla ice cream per bowl
1 drop of orange essential oil
1 drop cinnamon essential oil
Slice up pineapple and grill each side for 2 minutes. Place in bowls on top of ice cream. Mix Nutella with drops of essential oil and drizzle over pineapple. Serve.
I love using fresh ingredients, essential oils, resourcefulness, creativity and love in my dishes. The girls brought wine and we happily ate and shared stories. At each friend's place mat I had a card and gift to mark their seat. I made a Epsom salt bath soak for each friend with various essential oils that I thought they'd love. Lavender for my busy working friend to help relax. Lemon for another friend for energy. Joy in another to uplift. Panaway to help sooth. Lemongrass for my bohemian traveling friend. I mixed them all with some coconut oil and painted the tops to make them personal. Special, unique details are the best.
Hope you enjoy these recipes as much as we did!
Xo Lo
Thursday, July 16, 2015
What's the story morning glory?
Sometimes you just need breakfast on the go. And of course, the healthier the better. Since my daughter is now in full eating solids mode, I try to be versatile and prepare the healthiest foods I can.
This morning, in between Chuggington episodes, my daughter's giggles, and me attempting to work out, I threw this recipe together.
Morning Glory Muffins
1 1/4 cups flour
1 Tbsp baking powder
1 Tbsp sugar
 1/4 tsp salt
1 cup buttermilk (or any milk)
2 Tbsp coconut oil (or any oil)
2 Tbsp water
1/2 cup shredded carrot
1/4 cup raisins
1/2 cup shredded coconut
1 mashed banana
1 Tbsp chia seeds
1 tsp hemp seeds
1 Tbsp cinnamon
1 tsp allspice
Mix dry ingredients together, set aside. Mix wet ingredients together, combine with dry. Add in fruit and spices. Oil a muffin tin and scoop into each spot. Bake at 350 for 45 minutes or until a knife/toothpick comes out clean. ***You may have noticed I did not use eggs, I didn't have any so I was resourceful. Great for anyone with egg allergies. Or anyone who has no groceries...like me.***
They are so delicious and my 14 month old gobbled hers down. Perfect for a busy day that needs a boost of healthy energy. Enjoy!
xo Lo
This morning, in between Chuggington episodes, my daughter's giggles, and me attempting to work out, I threw this recipe together.
Morning Glory Muffins
1 1/4 cups flour
1 Tbsp baking powder
1 Tbsp sugar
 1/4 tsp salt
1 cup buttermilk (or any milk)
2 Tbsp coconut oil (or any oil)
2 Tbsp water
1/2 cup shredded carrot
1/4 cup raisins
1/2 cup shredded coconut
1 mashed banana
1 Tbsp chia seeds
1 tsp hemp seeds
1 Tbsp cinnamon
1 tsp allspice
Mix dry ingredients together, set aside. Mix wet ingredients together, combine with dry. Add in fruit and spices. Oil a muffin tin and scoop into each spot. Bake at 350 for 45 minutes or until a knife/toothpick comes out clean. ***You may have noticed I did not use eggs, I didn't have any so I was resourceful. Great for anyone with egg allergies. Or anyone who has no groceries...like me.***
They are so delicious and my 14 month old gobbled hers down. Perfect for a busy day that needs a boost of healthy energy. Enjoy!
xo Lo
Wednesday, April 22, 2015
Whirlwind
This year has been a whirlwind, with having my first child and working, sadly, my blog has taken a back seat (and a little bit of my cooking). I have cooked some fun, creative dishes and, of course, I forgot my camera in the diaper bag, or in the laundry basket, or next to my bed. You may have noticed my new blog name, I wanted to re-vamp my blog. I am hoping to take it the next level eventually. I just felt like this name was more me. I mean what is better than homemade béchamel or whipped cream?
But, I am getting better at keeping my head afloat now. My little girl is 11 months old, her 1st birthday party (expect a special blog featuring this celebration!) is around the corner.
.JPG) Lately, my time has consisted of playing with my daughter, work, and focused on moving (back to Colorado we go!) In the midst of that craziness, I've realized how important it is to take time for what I love. Cooking. There is something about taking a bunch of beautiful, random ingredients and conduct them in a symphony of flavor that produces something that makes you smile. One morning, it was that perfect temperature outside that I wanted to start my morning off with a cup off coffee on the front porch. Mind you this mellow morning lasted about 30 seconds, until my daughter wanted to play in the grass. But hey, I had 30 seconds... :)
Lately, my time has consisted of playing with my daughter, work, and focused on moving (back to Colorado we go!) In the midst of that craziness, I've realized how important it is to take time for what I love. Cooking. There is something about taking a bunch of beautiful, random ingredients and conduct them in a symphony of flavor that produces something that makes you smile. One morning, it was that perfect temperature outside that I wanted to start my morning off with a cup off coffee on the front porch. Mind you this mellow morning lasted about 30 seconds, until my daughter wanted to play in the grass. But hey, I had 30 seconds... :)
To give my plain 'ol coffee a little bit of fancy, I topped it with a whipped vanilla meringue. Added the perfect pop of sweetness, and just made me feel special.
After my daughter made it pretty clear this was not a morning of relaxation, I decided to introduce her to pancakes for the first time. Since, she is still being introduced to a lot of foods I chose to kick out the sugar, add in goat's milk (what we've decided to transition her to once she turns one), and I had some mascarpone cheese in my fridge, along with some oranges that needed zesting. And voila! Halen's Pancakes.
Halen's Pancakes
.JPG)
1/2 cup mascarpone cheese
2 cups flour
1 tsp baking powder
1 tsp cinnamon
1/2 tsp baking soda
pinch of salt
2 eggs
2 cups goat milk (buttermilk or whole milk would work deliciously)
1 tsp vanilla
zest from one orange
2 Tbsp butter
honey for serving
berries for serving
I started by combining the dry ingredients together. Then I whisked the vanilla, milk and orange zest into the eggs. Then I combined wet and dry ingredients together, I added the butter, being careful not to over mix. Let the batter sit for a few minutes. I got my skillet hot, placed a bit of butter and then I made silver dollar size pancakes for Halen using a tablespoon. For my husband and I, I used a 1/3 measuring cup.
Once the pancakes are done, I drizzled the adult pancakes with honey and placed a few blueberries and strawberries on top. For Halen's I placed them on her tray along with the berries. Needless to say, she approved!
My friend's birthday was this past weekend, and with the rising heat I decided a regular cake just wouldn't do. I had seen these watermelon faux cakes on Pinterest and decided to give it a go. I bought a small watermelon, sliced almonds and fruit all from Trader Joes to make this springtime gem.
.JPG) Dana's Watermelon "Cake"
Dana's Watermelon "Cake"
one small watermelon
2 kiwis
a handful of raspberries
1 cup sliced almonds
Homemade Whipped Cream
I sliced the watermelon to model the shape of a small cake, making sure the top and bottom were flat. Then I made my whipped cream. I iced the cake and used my hands to stick the almonds onto the sides of the cake. I sliced up some kiwis and fanned them out on top. I finished by placing a few raspberries on the very top.
.JPG)
Homemade Whipped Cream
1 cup heavy cream
1 Tbsp sugar
Whip the heavy cream on high, add in sugar. Let beat until peaks start to form. Do not over beat, or you will get butter.
.PNG)
.JPG) And for a perfect centerpiece to any dinner table, any celebration you can always make a personalized flower pot. We did this for Valentines Day, and we love using it for all different flowers. Made from yours truly, my dear Halen girl.
And for a perfect centerpiece to any dinner table, any celebration you can always make a personalized flower pot. We did this for Valentines Day, and we love using it for all different flowers. Made from yours truly, my dear Halen girl.
But, I am getting better at keeping my head afloat now. My little girl is 11 months old, her 1st birthday party (expect a special blog featuring this celebration!) is around the corner.
Lately, my time has consisted of playing with my daughter, work, and focused on moving (back to Colorado we go!) In the midst of that craziness, I've realized how important it is to take time for what I love. Cooking. There is something about taking a bunch of beautiful, random ingredients and conduct them in a symphony of flavor that produces something that makes you smile. One morning, it was that perfect temperature outside that I wanted to start my morning off with a cup off coffee on the front porch. Mind you this mellow morning lasted about 30 seconds, until my daughter wanted to play in the grass. But hey, I had 30 seconds... :) To give my plain 'ol coffee a little bit of fancy, I topped it with a whipped vanilla meringue. Added the perfect pop of sweetness, and just made me feel special.
After my daughter made it pretty clear this was not a morning of relaxation, I decided to introduce her to pancakes for the first time. Since, she is still being introduced to a lot of foods I chose to kick out the sugar, add in goat's milk (what we've decided to transition her to once she turns one), and I had some mascarpone cheese in my fridge, along with some oranges that needed zesting. And voila! Halen's Pancakes.
Halen's Pancakes
1/2 cup mascarpone cheese
2 cups flour
1 tsp baking powder
1 tsp cinnamon
1/2 tsp baking soda
pinch of salt
2 eggs
2 cups goat milk (buttermilk or whole milk would work deliciously)
1 tsp vanilla
zest from one orange
2 Tbsp butter
honey for serving
berries for serving
I started by combining the dry ingredients together. Then I whisked the vanilla, milk and orange zest into the eggs. Then I combined wet and dry ingredients together, I added the butter, being careful not to over mix. Let the batter sit for a few minutes. I got my skillet hot, placed a bit of butter and then I made silver dollar size pancakes for Halen using a tablespoon. For my husband and I, I used a 1/3 measuring cup.
Once the pancakes are done, I drizzled the adult pancakes with honey and placed a few blueberries and strawberries on top. For Halen's I placed them on her tray along with the berries. Needless to say, she approved!
My friend's birthday was this past weekend, and with the rising heat I decided a regular cake just wouldn't do. I had seen these watermelon faux cakes on Pinterest and decided to give it a go. I bought a small watermelon, sliced almonds and fruit all from Trader Joes to make this springtime gem.
one small watermelon
2 kiwis
a handful of raspberries
1 cup sliced almonds
Homemade Whipped Cream
I sliced the watermelon to model the shape of a small cake, making sure the top and bottom were flat. Then I made my whipped cream. I iced the cake and used my hands to stick the almonds onto the sides of the cake. I sliced up some kiwis and fanned them out on top. I finished by placing a few raspberries on the very top.
Homemade Whipped Cream
1 cup heavy cream
1 Tbsp sugar
Whip the heavy cream on high, add in sugar. Let beat until peaks start to form. Do not over beat, or you will get butter.
And for a perfect centerpiece to any dinner table, any celebration you can always make a personalized flower pot. We did this for Valentines Day, and we love using it for all different flowers. Made from yours truly, my dear Halen girl. Tuesday, November 11, 2014
What a girl wants...
When you have a craving...especially as a cook...it takes everything in you not to just whip out your garlic, onion, olive oil, saute pan and start cheffing it up.
I started back to work and the field across from where I teach is covered in cacti, and attached to the top of these cacti were these GORGEOUS fuschia colored prickly pears. Eventually, I had to stop staring at them every morning and afternoon, and actually pick some. Well this feat seemed a bit more challenging than my taste buds were ready for. I walk over to these massive cacti and start picking the luscious fruits off the tops. I hear yelling and look over to some construction workers waving their hands as if in warning. A kind man finally walks over to me and says, be careful those have a lot of tiny needles in them. As the words were coming out of his mouth, I look at my needle covered fingers. After pulling out the ones that bothered me the most, this kind man gave me a trash bag, and some gloves to finish picking my lot. {I think I continued pulling the tiniest of needles out of my hands for about a month, until they were all gone.}
Once home, I started to look up recipes for what to do with these amazing fruits. I remember various Mexican restaurants offering prickly pear margaritas or martinis on their menu, and figured that's were I would start. I immediately called my friend and we decided to have dinner that night and reap the rewards of my sore hands.
 But again, more challenges arose. These prickly pears are not easy fruit. They are a ratio of 90% seeds to 10% fruit in each and every pear. For most people, this just would not work. But I already picked dozens of these fruits and wanted a reward. So I cut around the seeds and peeled until I had about a cup of gorgeous pink colored flesh.
Prickly Pear Margarita
1 cup prickly pear flesh
2 parts margarita mix
1 part tequila
lime
salt
We blended these up and man were they delicious. All my sore, stained fingers relaxed as I sipped on my fabulous margarita.
To pair with that we decided to have an appetizer. As most of you know, I am a big fan of working with what I've got. So I looked in my pantry, prior to my arrival at my friend's house, and found beans, cotija cheese, and chips. So I decided to whip up a bean dip to go with our Mexican themed dinner.
Spicy Cotija Bean Dip
1 can of refried beans
1 can diced tomatoes
1/4 cup creamy dressing
1/4 onion, chopped finely
1 garlic clove, minced
1/3 cup cotija cheese
.JPG) I sauteed the onion until translucent, added the garlic and then added the tomatoes. Once this developed a wonderful perfume, I added in my refried beans (mine had jalapenos in them, choose the spiciness you prefer). This did not need to be on the heat for long, just enough to warm up the beans. To counter the spiciness, I added some creamy, feta cheese dressing (just happened to have it on hand), add whichever creamy dressing you prefer. This element would cool down the spicy beans, just a bit. Then I folded in half of the cotija cheese and topped the bean dip with the rest. I happened to have some muli-grain chips, which is what I served with the dip.
I sauteed the onion until translucent, added the garlic and then added the tomatoes. Once this developed a wonderful perfume, I added in my refried beans (mine had jalapenos in them, choose the spiciness you prefer). This did not need to be on the heat for long, just enough to warm up the beans. To counter the spiciness, I added some creamy, feta cheese dressing (just happened to have it on hand), add whichever creamy dressing you prefer. This element would cool down the spicy beans, just a bit. Then I folded in half of the cotija cheese and topped the bean dip with the rest. I happened to have some muli-grain chips, which is what I served with the dip. .JPG) Pizza a la carte
Pizza a la carte2 cornmeal crusts
sausage
mozzarella cheese
pesto
edamame
tomato slices
onion
asparagus
These pizzas are a blank canvas. They can really be anything you want them to be. The crusts are nice because they are crispier and have that crunchy bite to them that the cornmeal gives. For our main course, my friend had some delicious cornmeal crust pizzas. So we decided to use those and whip up some pizza a la carte. Meaning we added whatever we had on hand, on top. We made some pesto pizzas with mozzarella and we made some with sausage and veggies. Add whatever you like! Bake it at 350 for about 20 minutes or so.
Lamb Kebab Mediterranean Salad
.JPG)
lamb kebabs
romaine lettuce
kidney beans
garbanzo beans
tomatoes
beets
olives
creamy dressing
To round our our meal, we decided to also have a salad. First, we seared the lamb with olive oil, salt and pepper. Once the pieces had a crispy crust and enough time to be medium-rare, we took them off the stove and let them rest. Meanwhile, we cleaned our lettuce then in a large salad bowl combined all our ingredients. We mixed this with our creamy feta dressing and topped with the lamb kebabs and a bit of cotija cheese. What an amazing salad, full of flavor.
This menu is sure to please women and men alike. Make for a simple gathering or a fancy night in.
Enjoy!
xo Lo
Saturday, August 9, 2014
Mama's Brunch
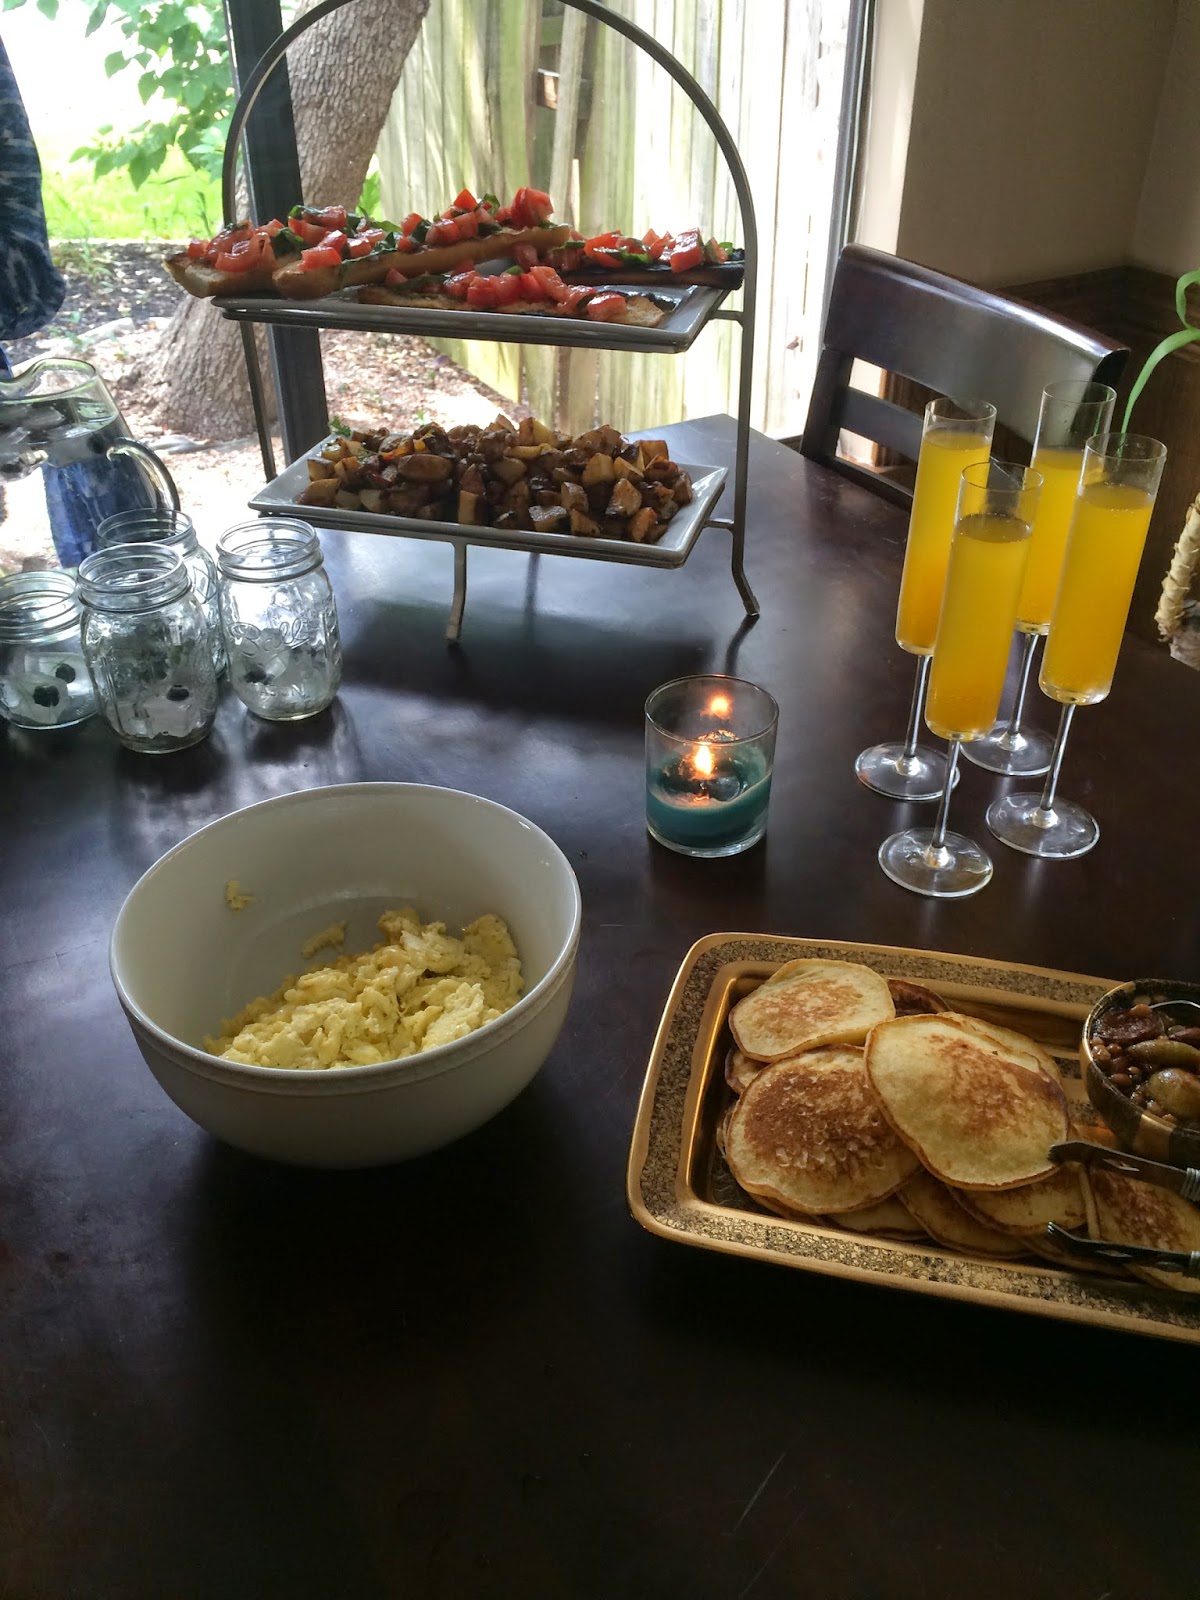 I love watching Food Network, I gain a lot of my inspiration for
cooking from here. Bobby Flay is a pretty incredible cook, I love his
show Brunch at Bobby's. Brunch is my all-time favorite meal. I
absolutely love it. When I became a mom I knew I would want to host a
brunch with all the mamas and babies. After a few months to get my
bearings, I was able to do so. I utilized one of Bobby Flay's brunches
as my foundation and tweaked the recipes just a bit to fit in my cooking
style.
I love watching Food Network, I gain a lot of my inspiration for
cooking from here. Bobby Flay is a pretty incredible cook, I love his
show Brunch at Bobby's. Brunch is my all-time favorite meal. I
absolutely love it. When I became a mom I knew I would want to host a
brunch with all the mamas and babies. After a few months to get my
bearings, I was able to do so. I utilized one of Bobby Flay's brunches
as my foundation and tweaked the recipes just a bit to fit in my cooking
style.
Orange-Ricotta Pancakes with Fig Compote
3/4 cup flour
2 Tbsp sugar
1/2 tsp baking powder
salt
1 cup ricotta cheese
3/4 cup milk
3 eggs, separated
1/2 tsp vanilla
orange zest
butter
Fig Compote
12 oz figs
4 Tbsp butter
1/4 cup honey
1/4 cup dark brown sugar
1/2 cup trail mix (or any nuts you have around)
salt
pepper
 Mix
dry ingredients together. Then combine ricotta, milk, egg yolks,
vanilla and zest in a separate bowl until smooth. Beat the egg whites in
a standing mixer until stiff. Add dry ingredients to the ricotta and
milk, fold to combine. Whisk in small amount of egg whites to lighten
the batter, then fold in the remaining egg whites. I heated up my
griddle and brushed the surface with butter. Use 1/3 cup to scoop batter
onto the griddle. When bubbles start to appear, flip.
Mix
dry ingredients together. Then combine ricotta, milk, egg yolks,
vanilla and zest in a separate bowl until smooth. Beat the egg whites in
a standing mixer until stiff. Add dry ingredients to the ricotta and
milk, fold to combine. Whisk in small amount of egg whites to lighten
the batter, then fold in the remaining egg whites. I heated up my
griddle and brushed the surface with butter. Use 1/3 cup to scoop batter
onto the griddle. When bubbles start to appear, flip.Add all ingredients for compote together in a small sauce pan, cook over high heat and stir frequently. Should take about two minutes for the figs to soften and break down. Pour into bowl for serving.
Italian Home Fries

3 cloves garlic
1 small onion, sliced thinly
1 small red bell pepper, diced
1 small yellow pepper, diced
1 1/2 lbs small new potatoes, diced
8 oz Italian hot sausage, remove from casing
1 Tbsp finely chopped fresh rosemary
2 Tbsp finely chopped fresh flat-leaf parsley
drizzle olive oil
salt & pepper
The night before (to save time) I chopped everything up and put it into a ziploc bag. I stuck it into the fridge and the next morning, heated up the butter on the griddle and poured the ingredients onto the griddle pan. I added the fresh herbs once the onions, peppers and potatoes started to cook. The smell is incredible! Once the sausage is browned, cooked through and potatoes are crunchy on the outside and soft on the inside, your home fries are done!

1 loaf of Italian bread
olive oil
salt & pepper
3 large tomatoes, roughly chopped
handful of basil, julienne
10 large eggs
4 oz Italian cheeses
Preheat grill pan over medium heat, slice bread, drizzle with olive oil and place down on pan. While bread toasts, toss tomatoes, olive oil, salt, pepper and julienne basil in a bowl. Once bread is toasted, mound the tomato mixture on top.
 Melt
butter into a large saute pan over low heat. Crack eggs into a separate
bowl and whisk until fluffy. Add in coarse black pepper. Add eggs into
the pan, mix gently with rubber spatula. Fold in cheese and after a few
minutes remove from heat. Serve eggs with bruschetta.
Melt
butter into a large saute pan over low heat. Crack eggs into a separate
bowl and whisk until fluffy. Add in coarse black pepper. Add eggs into
the pan, mix gently with rubber spatula. Fold in cheese and after a few
minutes remove from heat. Serve eggs with bruschetta.
champagne or prosecco
orange juice
pineapple juice
I love changing up mimosa flavors, find any yummy juice or nectar and top that off in your champagne glass.
Blueberry-Fennel Ice
ice cube tray
water
blueberries
 fennel sprigs
I decided to jazz up my ice for serving water, so I put a few blueberries and fennel sprigs in the cube tray. Freeze and it looks pretty with the color. You can use any fruit, herbs, etc.
It was so wonderful to get together with my great mama

 friends
and to see their babies. Our little ones played and we took some
adorable pictures. This brunch is great for any gathering.
friends
and to see their babies. Our little ones played and we took some
adorable pictures. This brunch is great for any gathering.Enjoy! xo Lo
Wednesday, August 6, 2014
Pizza!
My husband LOVES pizza. Every time I ask him what he wants for dinner, his answer is always, "pizza." Sometimes I'll ask him a question that is completely unrelated to food and his answer will still be, "pizza."
I've always wanted to make homemade pizza but I've failed many times...the crust has always given me a hard time. While grocery shopping a few weeks ago I stumbled upon frozen cornmeal crust pizza crusts. I was elated! Finally I could make homemade pizza! They were gluten-free which is a plus for many people and they were smaller so we could still use portion control.
Next I needed to find the toppings, our family friend gave us a jar of her homemade marinara sauce, so we definitely wanted to use that. Then I decided on leeks, chipotle sausage, and mozzarella cheese. But you can put any toppings you like on it. Leeks are a great alternative to onions, especially when they are all caramelized...yum!
Leek-Sausage Pizza on a Cornmeal Crust
 2 frozen cornmeal pizza crusts (or make your own or get regular crust)
1 lb chipotle sausage
1 large leek, sliced
1 cup shredded mozzarella cheese
1 cup marinara sauce
I baked my crusts just a tad so they were a little crisp. Meanwhile I sauteed my leeks until they were tender and caramelized. I also cooked the chipotle sausage until mostly cooked through. Once the crusts were ready, I ladled the homemade marinara sauce on top, a big scoop of sausage, leeks and finally, shredded mozzarella. Bake in 400 degree oven for about 10-15 minutes. This pizza was outstanding, we can't wait to make it again.
We served this with a simple romaine lettuce salad, raw mushrooms and southwest cheddar dressing.
This is a fantastic meal if you need to whip something up quickly, if you are craving pizza but don't want to ruin your healthy eating habits or just want a yummy dinner for a Friday movie night.
Enjoy! xo Lo
I've always wanted to make homemade pizza but I've failed many times...the crust has always given me a hard time. While grocery shopping a few weeks ago I stumbled upon frozen cornmeal crust pizza crusts. I was elated! Finally I could make homemade pizza! They were gluten-free which is a plus for many people and they were smaller so we could still use portion control.
Next I needed to find the toppings, our family friend gave us a jar of her homemade marinara sauce, so we definitely wanted to use that. Then I decided on leeks, chipotle sausage, and mozzarella cheese. But you can put any toppings you like on it. Leeks are a great alternative to onions, especially when they are all caramelized...yum!
Leek-Sausage Pizza on a Cornmeal Crust
2 frozen cornmeal pizza crusts (or make your own or get regular crust)1 lb chipotle sausage
1 large leek, sliced
1 cup shredded mozzarella cheese
1 cup marinara sauce
I baked my crusts just a tad so they were a little crisp. Meanwhile I sauteed my leeks until they were tender and caramelized. I also cooked the chipotle sausage until mostly cooked through. Once the crusts were ready, I ladled the homemade marinara sauce on top, a big scoop of sausage, leeks and finally, shredded mozzarella. Bake in 400 degree oven for about 10-15 minutes. This pizza was outstanding, we can't wait to make it again.
We served this with a simple romaine lettuce salad, raw mushrooms and southwest cheddar dressing.
This is a fantastic meal if you need to whip something up quickly, if you are craving pizza but don't want to ruin your healthy eating habits or just want a yummy dinner for a Friday movie night.
Enjoy! xo Lo
Monday, July 14, 2014
Chicken Milanese
Chicken Milanese is one of those iconic dishes that seems to be forgotten or skipped over. I wanted to rejuvenate this recipe a bit.
Chicken Milanese

chicken breasts (2-4)
1 cup panko bread crumbs
1 cup flour
2 eggs
fennel bulb
cherry tomatoes, halved
garlic
1/2 cup cream cheese
penne pasta
salt
pepper
Preheat oven on the lowest setting, 150-170.
Boil water for the pasta, put plenty of salt in the water, once bubbling add in whichever pasta you prefer, I used penne.
Take your chicken breasts and pound them until they are about a 1/2 inch thick. Sometimes the breasts are so large I cut them in half. In three bowls add flour, salt and pepper in one, eggs in the second and panko in the third. Dip the breasts into the flour, then coat with the eggs and dredge in the panko bread crumbs. Once pasta is al dente, drain.
Brown each side of the chicken using olive oil in a hot pan, about three minutes per side. Then place the coated chicken breasts on a baking sheet with a wire rack on it, put in the oven to cook through and keep warm.
In the same pan you browned the chicken in, add in the fennel, let it cook until soft. Then add in the garlic and lastly the tomatoes. Once the vegetables are soft, add in the cream cheese to create a creamy sauce. Retrieve the chicken from the oven. Spoon pasta in bowl, top with crispy chicken and finally the creamy sauce. I garnished with a little of the fennel sprigs. The panko makes this chicken even more crispy and slow cooking makes the chicken extra moist. The bite from the fennel and creaminess from the sauce makes this dish irresistible. Any guest will love this meal.
Enjoy! xo Lo
Chicken Milanese
chicken breasts (2-4)
1 cup panko bread crumbs
1 cup flour
2 eggs
fennel bulb
cherry tomatoes, halved
garlic
1/2 cup cream cheese
penne pasta
salt
pepper
Preheat oven on the lowest setting, 150-170.
Boil water for the pasta, put plenty of salt in the water, once bubbling add in whichever pasta you prefer, I used penne.
Take your chicken breasts and pound them until they are about a 1/2 inch thick. Sometimes the breasts are so large I cut them in half. In three bowls add flour, salt and pepper in one, eggs in the second and panko in the third. Dip the breasts into the flour, then coat with the eggs and dredge in the panko bread crumbs. Once pasta is al dente, drain.
Brown each side of the chicken using olive oil in a hot pan, about three minutes per side. Then place the coated chicken breasts on a baking sheet with a wire rack on it, put in the oven to cook through and keep warm.
In the same pan you browned the chicken in, add in the fennel, let it cook until soft. Then add in the garlic and lastly the tomatoes. Once the vegetables are soft, add in the cream cheese to create a creamy sauce. Retrieve the chicken from the oven. Spoon pasta in bowl, top with crispy chicken and finally the creamy sauce. I garnished with a little of the fennel sprigs. The panko makes this chicken even more crispy and slow cooking makes the chicken extra moist. The bite from the fennel and creaminess from the sauce makes this dish irresistible. Any guest will love this meal.
Enjoy! xo Lo
Pass the dessert please!
I have been on quite the hiatus since I gave birth to my daughter two months ago. It has been a whirlwind and I'm finally starting to feel more settled. Halen is my gorgeous daughter and I love her more with every breath she takes.
My dad and his girlfriend were coming over for dinner so I wanted to make a special dessert. As always, I looked around my pantry to see what I had. I had Nutella and almonds. I decided to make mini cheesecakes. I grabbed cream cheese and almond crisp cookies from the grocery store and got to work.
Nutella Cheesecake
 3/4 package of cream cheese
2/3 c Nutella
1 tsp vanilla
12 crisp cookies
2 Tbsp butter
1/2 chopped almonds
The best thing about this cheesecake is it does not require baking, which makes it super easy to put together and set aside until your guests arrive. In a hand mixer or standing mixer, blend the cream cheese and Nutella together. Add in the vanilla when well blended, set aside.
 You can use any kind of cookies you want, I decided to use thin, crisp almond cookies. I took about 12 and crunched them up until they were in tiny pieces. Then I mixed them with melted butter. To give this dessert some extra special flair I decided to use my grandmother's old tea cups. I pressed the cookie mixture into the bottom and then spooned the Nutella mixture on top. Then I put them into the fridge; you want them to chill for at least two hours before serving.
Once our dinner was finished I retrieved the cheesecakes, topped them with whipped cream (usually I make mine homemade...but alas being a mom you learn to cut corners sometimes) then topped each individual cheesecake with some chopped almonds.
They were creamy, just the right amount of chocolate with a delicious buttery crunch from the cookie crust and nuttiness from the almonds. A perfect summer dessert!
Mango-Roasted Almond-Oatmeal Cookies

1 cup of almonds
1 cup of oatmeal
1/2 cup of softened butter
1/2 cup olive oil
2 eggs
1 1/2 cups flour
1 tsp baking powder
2 cups dark brown sugar
1 tsp salt
1 cup chopped, dried mango
Instead of the typical oatmeal-raisin cookie, I wanted to step it up a notch. I ended up having dried mango and almonds, so I decided to use those.
Pre-heat oven to 350 and lay the almonds on a baking sheet. Roast for about 5-10 minutes.
Mix dry ingredients in a bowl, set aside. Mix butter, olive oil and brown sugar in a mixer. Add in eggs and vanilla. Slowly add in dry ingredients. Once fully mixed, add in oats. Lastly, add in almonds and dried mango.
Use cookie scoop to lay on baking sheet. Bake for about 9 minutes and let cool. This cookie is a great vehicle to add in any types of nuts you may have in your pantry or dried fruit. Makes for a more exciting, delicious cookie!
Hope you enjoy! xo Lo
My dad and his girlfriend were coming over for dinner so I wanted to make a special dessert. As always, I looked around my pantry to see what I had. I had Nutella and almonds. I decided to make mini cheesecakes. I grabbed cream cheese and almond crisp cookies from the grocery store and got to work.
Nutella Cheesecake
2/3 c Nutella
1 tsp vanilla
12 crisp cookies
2 Tbsp butter
1/2 chopped almonds
The best thing about this cheesecake is it does not require baking, which makes it super easy to put together and set aside until your guests arrive. In a hand mixer or standing mixer, blend the cream cheese and Nutella together. Add in the vanilla when well blended, set aside.
You can use any kind of cookies you want, I decided to use thin, crisp almond cookies. I took about 12 and crunched them up until they were in tiny pieces. Then I mixed them with melted butter. To give this dessert some extra special flair I decided to use my grandmother's old tea cups. I pressed the cookie mixture into the bottom and then spooned the Nutella mixture on top. Then I put them into the fridge; you want them to chill for at least two hours before serving.Once our dinner was finished I retrieved the cheesecakes, topped them with whipped cream (usually I make mine homemade...but alas being a mom you learn to cut corners sometimes) then topped each individual cheesecake with some chopped almonds.
They were creamy, just the right amount of chocolate with a delicious buttery crunch from the cookie crust and nuttiness from the almonds. A perfect summer dessert!
Mango-Roasted Almond-Oatmeal Cookies
1 cup of almonds
1 cup of oatmeal
1/2 cup of softened butter
1/2 cup olive oil
2 eggs
1 1/2 cups flour
1 tsp baking powder
2 cups dark brown sugar
1 tsp salt
1 cup chopped, dried mango
Instead of the typical oatmeal-raisin cookie, I wanted to step it up a notch. I ended up having dried mango and almonds, so I decided to use those.
Pre-heat oven to 350 and lay the almonds on a baking sheet. Roast for about 5-10 minutes.
Mix dry ingredients in a bowl, set aside. Mix butter, olive oil and brown sugar in a mixer. Add in eggs and vanilla. Slowly add in dry ingredients. Once fully mixed, add in oats. Lastly, add in almonds and dried mango.
Use cookie scoop to lay on baking sheet. Bake for about 9 minutes and let cool. This cookie is a great vehicle to add in any types of nuts you may have in your pantry or dried fruit. Makes for a more exciting, delicious cookie!
Hope you enjoy! xo Lo
Saturday, April 5, 2014
All Wrapped Up- Part One: Making Frozen Meals for Family
Now that I am 36 weeks pregnant I am making all those last minute preparations for our sweet girl's arrival. Of course, one of my biggest concerns is food...what will we eat? Thankfully, my best friend has rounded up some helpful family and friends who have offered to cook us meals during those first few weeks home with our Halen. But I know they can't provide every meal for us, so I've decided to do a frozen food series for new moms, families on the go or even for family reunions.
My first recipe for my frozen food series is breakfast burritos. My husband and I are huge fans of breakfast...especially me. So I wanted to make sure we'd have something yummy and satisfying when we're up in the wee hours.
Breakfast Burritos
24 tortillas
10 eggs
1 package of sausage
1 can black beans
2 large red potatoes
1 cup (+) colby jack cheese
salsa
 When I originally found this recipe it wanted everything to be pre-made, frozen hash browns, etc. Well even though I am trying to save time by making food ahead doesn't mean I want health aspects to suffer. So I bought everything as naturally as I could and cooked it all myself. You can get any tortillas you like, I really like the ones that are half flour, half corn. Eggs, I always purchase free-range, brown eggs. For the sausage, I purchased hatch green chile sausage for a bit of a kick. I love my black beans and think they add not only extra protein to my burritos but they're so yummy. Red potatoes are healthier than your regular potatoes, colby jack cheese melts really well. And any salsa you prefer.
First thing you want to do is dice up your potatoes rather small and cook them in a large bottom
 skillet with some olive oil. Once they start to brown, add in your diced sausage (you can also use ground sausage). Once those two are fully cooked and on the crispy side, scramble your eggs and pour them in the skillet. Turn your heat down and gently fold in your egg mixture. Add a pinch of salt and pepper, continue to fold. Once the eggs start to hold together and don't look runny you're about done. Add the egg mixture into a bowl and set up your wrapping station.
 You'll need plastic wrap, two large freezer Ziploc bags, your grated cheese and black beans ready to go. I would tear a few pieces of plastic wrap at a time so I didn't have to stop my process each time I needed more plastic wrap. Lay your tortilla down on the plastic wrap, fill with egg mixture, top with grated cheese, and a spoonful of black beans. Use the plastic wrap to wrap up the breakfast burrito nice and tight and set to the side.
.JPG) Continue process until you've used all your eggs and tortillas. Then date and label your freezer bags, add the wrapped breakfast burritos inside, let out all the air, zip shut, and add into your freezer.
Continue process until you've used all your eggs and tortillas. Then date and label your freezer bags, add the wrapped breakfast burritos inside, let out all the air, zip shut, and add into your freezer.

When you're ready to eat your frozen breakfast
burritos, simply take the number you want out of the bag, heat up add salsa on top and dig in! These are perfect for any mom-to-be preparing for her little one to come home, for a mom on the go preparing food for her family or even preparation for a family reunion coming up (since summer is around the corner!).
Enjoy! xoxo Lo
My first recipe for my frozen food series is breakfast burritos. My husband and I are huge fans of breakfast...especially me. So I wanted to make sure we'd have something yummy and satisfying when we're up in the wee hours.
Breakfast Burritos
24 tortillas
10 eggs
1 package of sausage
1 can black beans
2 large red potatoes
1 cup (+) colby jack cheese
salsa
First thing you want to do is dice up your potatoes rather small and cook them in a large bottom
You'll need plastic wrap, two large freezer Ziploc bags, your grated cheese and black beans ready to go. I would tear a few pieces of plastic wrap at a time so I didn't have to stop my process each time I needed more plastic wrap. Lay your tortilla down on the plastic wrap, fill with egg mixture, top with grated cheese, and a spoonful of black beans. Use the plastic wrap to wrap up the breakfast burrito nice and tight and set to the side. When you're ready to eat your frozen breakfast
burritos, simply take the number you want out of the bag, heat up add salsa on top and dig in! These are perfect for any mom-to-be preparing for her little one to come home, for a mom on the go preparing food for her family or even preparation for a family reunion coming up (since summer is around the corner!).
Enjoy! xoxo Lo
Sunday, February 2, 2014
Baby Shower for Morgan and her little dove Cora Elizabeth
One of my favorite things to do is plan a party and of course make food for that party. Every day there is a new reason to celebrate. This past Saturday was my wonderful friend, Morgan's baby shower for her baby girl on the way: Cora Elizabeth. I signed myself up right away to make a few savory and sweet items for the special day.
.JPG) Morgan's friends did an incredible job, decorating, creating fun games and putting together some additional tasty treats. For Morgan's shower I wanted to take a large onion tart that I had made before and make tartlets. I wanted to do the same for a citrus cake I had made previously, make mini cupcakes. And what good is a baby shower without some onesie cookies...right? Here are my recipes below.
Morgan's friends did an incredible job, decorating, creating fun games and putting together some additional tasty treats. For Morgan's shower I wanted to take a large onion tart that I had made before and make tartlets. I wanted to do the same for a citrus cake I had made previously, make mini cupcakes. And what good is a baby shower without some onesie cookies...right? Here are my recipes below.
.JPG) Caramelized Onion Tartlets with Manchego Cheese
Caramelized Onion Tartlets with Manchego Cheese
3 pie crusts (premade or homemade)
2 medium/large yellow onions
3 pieces of cooked ham (or bacon or proscuitto)
1/2 cup fresh parsley
1/2 stick butter
2 Tbsp olive oil
1 cup manchego cheese
1 cup half & half
1 egg
salt
pepper
First you want to take your pie crusts and use a 3 inch biscuit cutter to cut out some circles. Grease you mini (or regular) muffin tin. Then put the pie circles inside so they look like mini tart shells. Bake these at 425 for about 15 minutes.

Next, heat up your pan or skillet and drop in the butter and oil. While that heats up, peel and thinly slice your onions. Place them in the skillet to caramelize, this will take about 15 or so minutes. Keep your heat to medium low because you don't want them to get crispy. Keep stirring every few minutes. Then chop up your ham (or bacon) add that to your onion mixture. You want to chop up your fresh parsley very finely and add that to the onion mixture as well. Add a bit of salt and pepper and mix around. Remove from heat and once your pie shells are cooled spoon the mixture into your mini shells.
.JPG) Grate your manchego (you can also use gruyere) cheese and place about a spoonful on top of each tart. Then beat your egg and add in the half and half, add about a spoonful of that onto each tart (this creates your custard for the tart). Bake these at 350 for about 20 minutes. They will be a bubbling golden brown.
Grate your manchego (you can also use gruyere) cheese and place about a spoonful on top of each tart. Then beat your egg and add in the half and half, add about a spoonful of that onto each tart (this creates your custard for the tart). Bake these at 350 for about 20 minutes. They will be a bubbling golden brown.
Lemon-Chiffon Cupcakes with Citrus Buttercream Icing
 Lemon-Chiffon Cupcakes with Citrus Buttercream Icing
Topped with Candied Grapefruit and Cranberries
2 1/2 cups flour
1 1/3 cups sugar
1 Tbsp baking powder
1 tsp salt
1/2 cup vegetable oil
5 large eggs separated
3/4 cup orange-banana juice
3 Tbsp orange, grapefruit & lemon zest
1/2 tsp cream of tartar
Preheat oven to 350. Combine first four ingredients in your standing mixer, in the center add in egg yolks, oil and juice. Beat on a medium speed for 3-4 minutes until the mixture becomes smooth. Stir in zest. Remove from mixer into a large bowl. Clean mixing bowl and add in egg whites and cream of tartar, beat on high until you see stiff peaks (like whipped cream or meringue). Gently fold the egg whites into the batter. Spoon into your greased mini cupcake tin and bake for about 15 minutes. Let cool for 10 minutes before adding the icing.
.JPG) Citrus Buttercream Icing
Citrus Buttercream Icing
1/2 cup soft butter
3 Tbsp orange, grapefruit & lemon zest
2 cups powdered sugar
3 Tbsp fresh Meyer lemon juice
Beat the butter with the zest on medium speed, when the mixture becomes creamy start slowly adding in your powdered sugar (about 1/3 cup at a time). Then add in your fresh lemon juice. You will begin to see the consistency turn into a frosting. Apply to each cupcake.
Candied Grapefruit and Cranberries
1 grapefruit
1 1/2 cups fresh cranberries
1 cup sugar
3 cups water
Add water to a medium sized pot, put heat on medium and add in sugar. Stir until sugar has dissolved. Slice up grapefruit into small pieces (rind intact). Add in cranberries whole. Stir so the sugar water coats each piece of fruit. Let the water come to a gentle bubble. Occasionally stir the fruit around, keep in sugar water for about 30 minutes. This will remove the tartness from the berries and the sourness from the grapefruit rind. Use a piece of parchment paper or foil and spoon the fruit onto the paper to cool. After about 10 minutes check them, they should be sticky, like gummy candy. Place on top of your cupcakes for a unique, delicious topping.
.JPG) Onesie Cream Cheese Sugar Cookies with Orange Icing
Onesie Cream Cheese Sugar Cookies with Orange Icing
1 cookie cutter (any shape)
3 1/4 cups flour
3/4 tsp baking powder
1 package of cream cheese
2 cups sugar
1 cup butter, softened
1/4 tsp salt
2 tsps vanilla
1 egg
In your standing mixer add in butter and cream cheese. Cream until smooth. Meanwhile add, flour, baking powder and salt together. Set aside. Add sugar into butter mixture, beat for about two minutes. Beat in egg and vanilla. On low speed, gradually add in flour mixture. Dough will be soft and sticky.
.JPG) Divide dough in half, wrap in plastic wrap and refrigerate for at least two hours. Preheat oven to 350 and grease cookie sheets. Once dough has chilled, roll out and use cookie cutter to cut out 1/4 inch thick cookies. Spread out about two inches apart and bake for about 12 minutes. Let cool before icing.
Divide dough in half, wrap in plastic wrap and refrigerate for at least two hours. Preheat oven to 350 and grease cookie sheets. Once dough has chilled, roll out and use cookie cutter to cut out 1/4 inch thick cookies. Spread out about two inches apart and bake for about 12 minutes. Let cool before icing.
Orange Poured Fondant Icing (Naturally colored)
1 Tbsp milk
1/4 tsp of orange extract
3-5 tsp light corn syrup
1 1/3 cups confectioners sugar
1 Tbsp beet juice
.JPG) In your standing mixer, add in milk, corn syrup and 1/3 a cup of confectioner sugar at a time. If you need to use more add more, if you need to add more milk to keep the icing smooth add a bit more. Add orange extract and beet juice. The beet juice is a natural way to color your icing instead of using chemical-laden dye. And you can't even taste it! Plus the color was perfect. Use immediately. When you apply to cookie the icing will dry pretty quickly so decorate right away.
In your standing mixer, add in milk, corn syrup and 1/3 a cup of confectioner sugar at a time. If you need to use more add more, if you need to add more milk to keep the icing smooth add a bit more. Add orange extract and beet juice. The beet juice is a natural way to color your icing instead of using chemical-laden dye. And you can't even taste it! Plus the color was perfect. Use immediately. When you apply to cookie the icing will dry pretty quickly so decorate right away.

The baby shower was a huge success! Delicious food and wonderful company. It is a precious time watching all my friends transform from beautiful women to beautiful mothers.

These recipes would be perfect for any party. Your guests will feel incredibly special and your guest of honor will feel showered with love. Enjoy! xo Lo
3 pie crusts (premade or homemade)
2 medium/large yellow onions
3 pieces of cooked ham (or bacon or proscuitto)
1/2 cup fresh parsley
1/2 stick butter
2 Tbsp olive oil
1 cup manchego cheese
1 cup half & half
1 egg
salt
pepper
First you want to take your pie crusts and use a 3 inch biscuit cutter to cut out some circles. Grease you mini (or regular) muffin tin. Then put the pie circles inside so they look like mini tart shells. Bake these at 425 for about 15 minutes.
Next, heat up your pan or skillet and drop in the butter and oil. While that heats up, peel and thinly slice your onions. Place them in the skillet to caramelize, this will take about 15 or so minutes. Keep your heat to medium low because you don't want them to get crispy. Keep stirring every few minutes. Then chop up your ham (or bacon) add that to your onion mixture. You want to chop up your fresh parsley very finely and add that to the onion mixture as well. Add a bit of salt and pepper and mix around. Remove from heat and once your pie shells are cooled spoon the mixture into your mini shells.
Lemon-Chiffon Cupcakes with Citrus Buttercream Icing
Topped with Candied Grapefruit and Cranberries
2 1/2 cups flour
1 1/3 cups sugar
1 Tbsp baking powder
1 tsp salt
1/2 cup vegetable oil
5 large eggs separated
3/4 cup orange-banana juice
3 Tbsp orange, grapefruit & lemon zest
1/2 tsp cream of tartar
Preheat oven to 350. Combine first four ingredients in your standing mixer, in the center add in egg yolks, oil and juice. Beat on a medium speed for 3-4 minutes until the mixture becomes smooth. Stir in zest. Remove from mixer into a large bowl. Clean mixing bowl and add in egg whites and cream of tartar, beat on high until you see stiff peaks (like whipped cream or meringue). Gently fold the egg whites into the batter. Spoon into your greased mini cupcake tin and bake for about 15 minutes. Let cool for 10 minutes before adding the icing.
1/2 cup soft butter
3 Tbsp orange, grapefruit & lemon zest
2 cups powdered sugar
3 Tbsp fresh Meyer lemon juice
Beat the butter with the zest on medium speed, when the mixture becomes creamy start slowly adding in your powdered sugar (about 1/3 cup at a time). Then add in your fresh lemon juice. You will begin to see the consistency turn into a frosting. Apply to each cupcake.
Candied Grapefruit and Cranberries
1 grapefruit
1 1/2 cups fresh cranberries
1 cup sugar
3 cups water
Add water to a medium sized pot, put heat on medium and add in sugar. Stir until sugar has dissolved. Slice up grapefruit into small pieces (rind intact). Add in cranberries whole. Stir so the sugar water coats each piece of fruit. Let the water come to a gentle bubble. Occasionally stir the fruit around, keep in sugar water for about 30 minutes. This will remove the tartness from the berries and the sourness from the grapefruit rind. Use a piece of parchment paper or foil and spoon the fruit onto the paper to cool. After about 10 minutes check them, they should be sticky, like gummy candy. Place on top of your cupcakes for a unique, delicious topping.
1 cookie cutter (any shape)
3 1/4 cups flour
3/4 tsp baking powder
1 package of cream cheese
2 cups sugar
1 cup butter, softened
1/4 tsp salt
2 tsps vanilla
1 egg
In your standing mixer add in butter and cream cheese. Cream until smooth. Meanwhile add, flour, baking powder and salt together. Set aside. Add sugar into butter mixture, beat for about two minutes. Beat in egg and vanilla. On low speed, gradually add in flour mixture. Dough will be soft and sticky.
Divide dough in half, wrap in plastic wrap and refrigerate for at least two hours. Preheat oven to 350 and grease cookie sheets. Once dough has chilled, roll out and use cookie cutter to cut out 1/4 inch thick cookies. Spread out about two inches apart and bake for about 12 minutes. Let cool before icing.Orange Poured Fondant Icing (Naturally colored)
1 Tbsp milk
1/4 tsp of orange extract
3-5 tsp light corn syrup
1 1/3 cups confectioners sugar
1 Tbsp beet juice
In your standing mixer, add in milk, corn syrup and 1/3 a cup of confectioner sugar at a time. If you need to use more add more, if you need to add more milk to keep the icing smooth add a bit more. Add orange extract and beet juice. The beet juice is a natural way to color your icing instead of using chemical-laden dye. And you can't even taste it! Plus the color was perfect. Use immediately. When you apply to cookie the icing will dry pretty quickly so decorate right away.The baby shower was a huge success! Delicious food and wonderful company. It is a precious time watching all my friends transform from beautiful women to beautiful mothers.
These recipes would be perfect for any party. Your guests will feel incredibly special and your guest of honor will feel showered with love. Enjoy! xo Lo
Friday, January 17, 2014
Early bird gets the worm!
It seems the older I get (and the more pregnant I get) I rise even earlier each morning. And of course what good is a morning without a delicious breakfast? In this post I have compiled two of my favorite breakfast items.
On week day mornings I try to be as healthy as possible...smoothies are the way to go. And so easy! You can add just about anything you want or have on hand into your blender and puree up a scrumptious, healthy start to your work day.
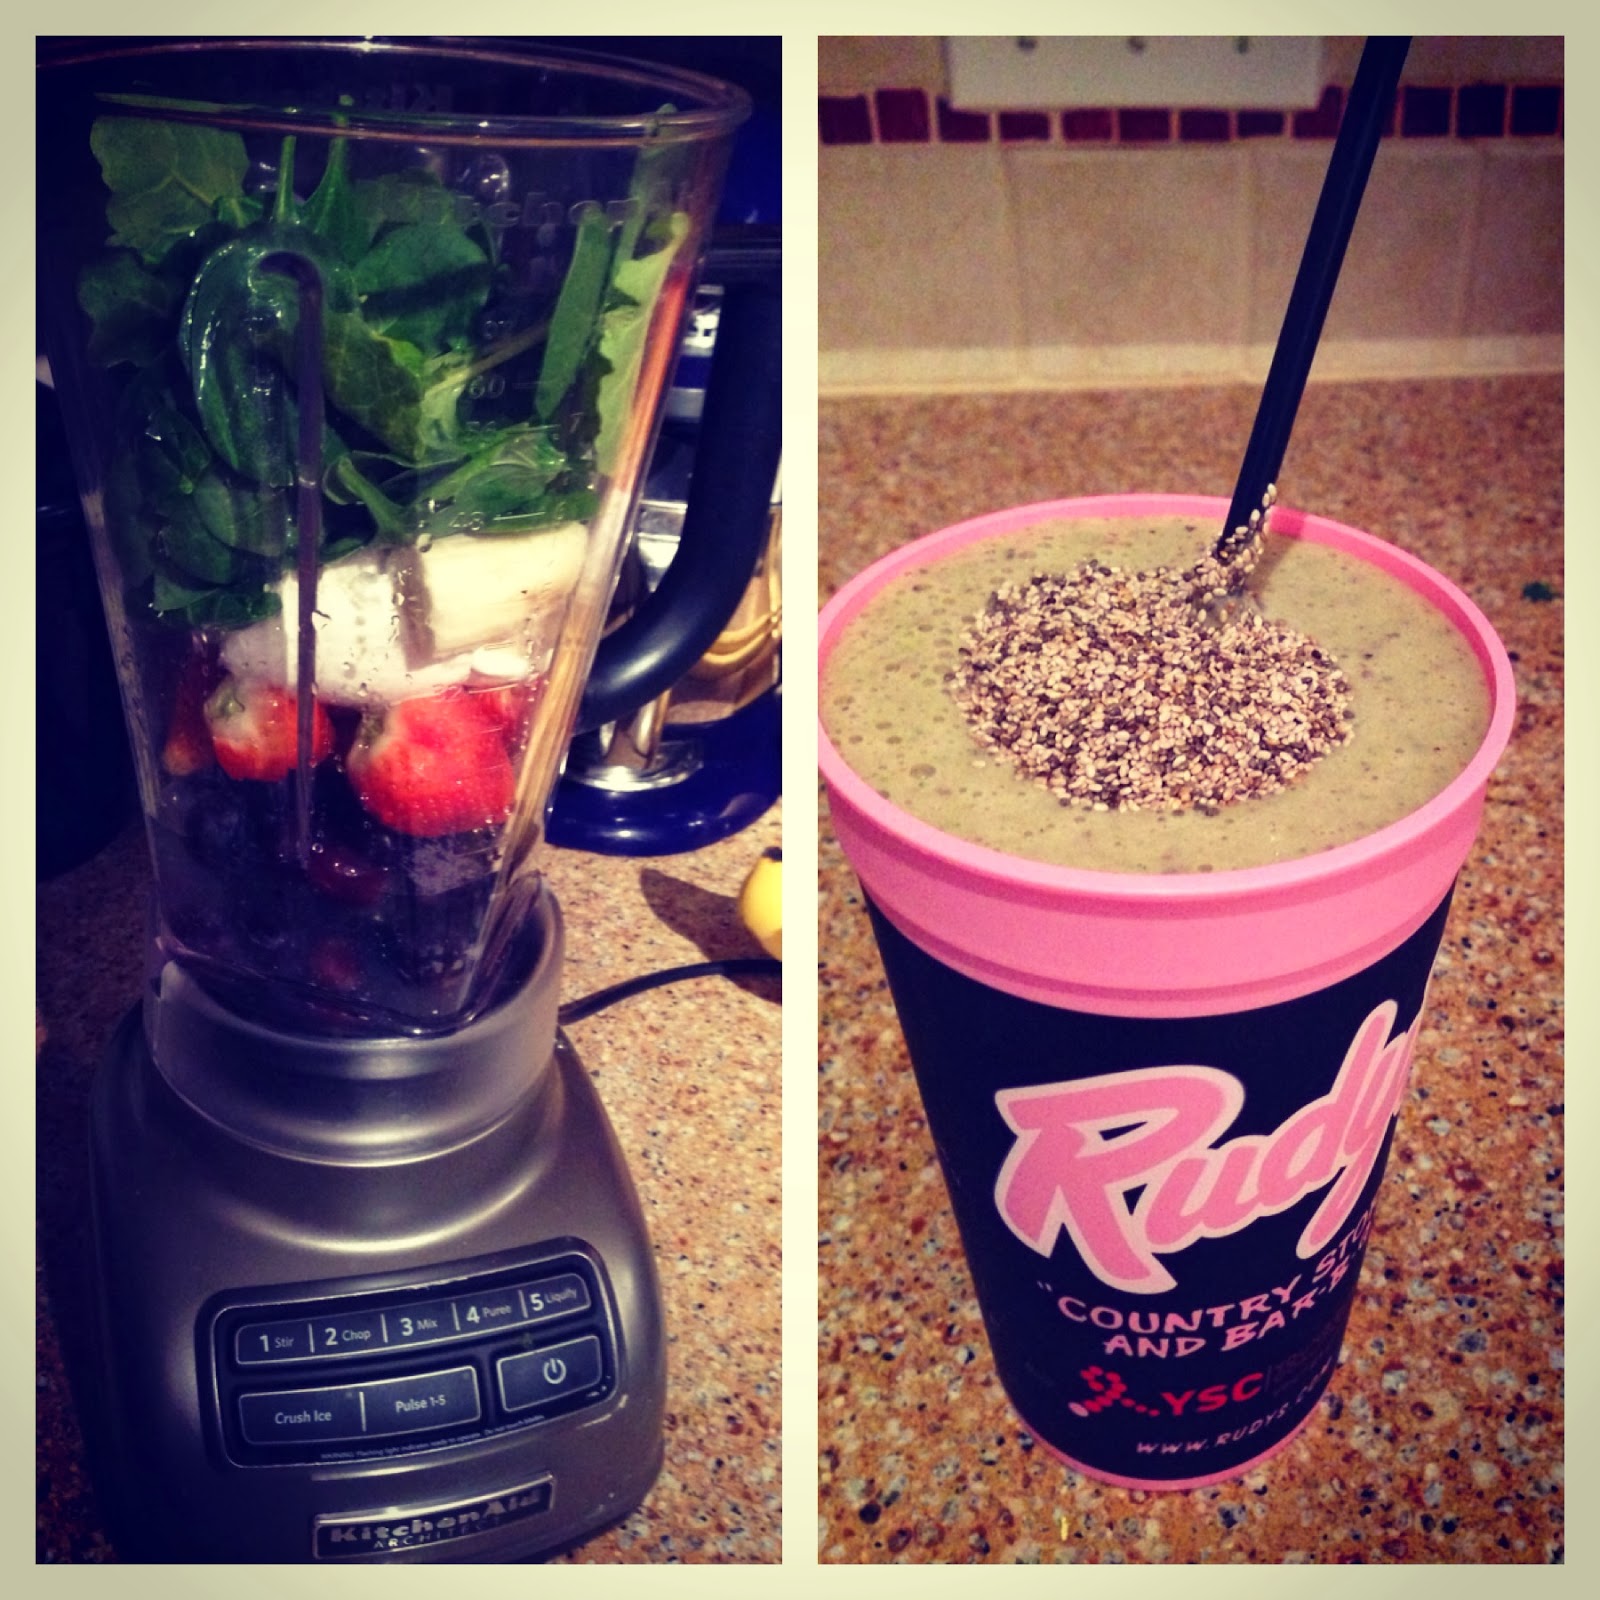 Mean Green Smoothie
3/4 cup Greek plain full fat yogurt
1 banana
1 cup of juice/milk
1/2 cup blueberries
1/2 cup raspberries
1/2 cup strawberries
1 cup spinach/kale mix
1 Tbsp honey
1 Tbsp chia seeds
Don't let the word "green" scare you. Trust me, you won't taste the green in this mean green smoothie. The reason I add spinach and kale into my smoothie is to give myself that extra serving of vegetables that are so good for you. You'll taste the fruit you add into the smoothie. You'll notice that I put different examples of a liquid...I usually use the juice we have on hand (orange or apple) but I've also used coconut water and that tasted great. I use full fat Greek yogurt because I want the healthy fats and love the creaminess it adds to my smoothie. Then I pulse this altogether, once it is pureed I slowly add in a few ice cubes until it reaches the consistency that I prefer. Then when I pour it into my cup, I add chia seeds on top and mix it around before I drink. This adds another punch to the super healthy smoothie. This breakfast will give you so much energy and just make you feel good. For you mamas-to-be this is an awesome pregnant breakfast, great for you and amazing for your growing baby.

Quinoa-Citrus-Currant Muffins
2 cups of cooked quinoa (follow instructions on bag)
1 1/2 cups flour
2 tsp baking soda
3/4 cup brown sugar
1 egg
1/2 tsp salt
1/4 cup safflower oil
1/2 cup whole milk
1/2 cup dried currants
2 Tbsp orange zest
2 Tbsp fresh orange juice
Mix wet ingredients together in a standing mixer. Meanwhile, add dry ingredients together and mix with a fork until combined. Slowly add in dry ingredients to wet ingredients. Add in currants. Lastly add in juice and zest. Spoon into a greased and floured muffin pan. Bake at 350 degrees for 25 minutes.
The fluffy quinoa gives these healthy muffins a moist texture and the currants give you a pop of tartness. You can really add any dried fruit, fresh fruit or nuts that you have on hand as well. I took these to my best friend who had recently had her first baby, a great treat for a loved one.
Both of these breakfasts are winners and don't take long to make. I hope you enjoy! xo Lo
On week day mornings I try to be as healthy as possible...smoothies are the way to go. And so easy! You can add just about anything you want or have on hand into your blender and puree up a scrumptious, healthy start to your work day.
3/4 cup Greek plain full fat yogurt
1 banana
1 cup of juice/milk
1/2 cup blueberries
1/2 cup raspberries
1/2 cup strawberries
1 cup spinach/kale mix
1 Tbsp honey
1 Tbsp chia seeds
Don't let the word "green" scare you. Trust me, you won't taste the green in this mean green smoothie. The reason I add spinach and kale into my smoothie is to give myself that extra serving of vegetables that are so good for you. You'll taste the fruit you add into the smoothie. You'll notice that I put different examples of a liquid...I usually use the juice we have on hand (orange or apple) but I've also used coconut water and that tasted great. I use full fat Greek yogurt because I want the healthy fats and love the creaminess it adds to my smoothie. Then I pulse this altogether, once it is pureed I slowly add in a few ice cubes until it reaches the consistency that I prefer. Then when I pour it into my cup, I add chia seeds on top and mix it around before I drink. This adds another punch to the super healthy smoothie. This breakfast will give you so much energy and just make you feel good. For you mamas-to-be this is an awesome pregnant breakfast, great for you and amazing for your growing baby.
Quinoa-Citrus-Currant Muffins
2 cups of cooked quinoa (follow instructions on bag)
1 1/2 cups flour
2 tsp baking soda
3/4 cup brown sugar
1 egg
1/2 tsp salt
1/4 cup safflower oil
1/2 cup whole milk
1/2 cup dried currants
2 Tbsp orange zest
2 Tbsp fresh orange juice
Mix wet ingredients together in a standing mixer. Meanwhile, add dry ingredients together and mix with a fork until combined. Slowly add in dry ingredients to wet ingredients. Add in currants. Lastly add in juice and zest. Spoon into a greased and floured muffin pan. Bake at 350 degrees for 25 minutes.
The fluffy quinoa gives these healthy muffins a moist texture and the currants give you a pop of tartness. You can really add any dried fruit, fresh fruit or nuts that you have on hand as well. I took these to my best friend who had recently had her first baby, a great treat for a loved one.
Both of these breakfasts are winners and don't take long to make. I hope you enjoy! xo Lo
Sunday, January 5, 2014
Baby it's cold outside! A day's worth of yummy foods while staying cozy inside.
Whenever it is frigid outside I love to make foods that comfort the soul. Since I've been pregnant (6 months!) I have craved pancakes...in all varieties. And as much as I'd like to go out to eat every morning...our baby budget doesn't quite allow that. So I've given making them myself a go.
This particular morning I looked in my fridge and had fresh raspberries, left over sour cream and honey. I decided to be brave and use all of these ingredients in my pancakes.
Raspberry Sour Cream Pancakes with Orange Blossom Honey
Ingredients:
1 1/2 cups flour
3 Tbsp sugar
2 tsp baking powder
1 1/2 tsp salt
1/2 cup sour cream
3/4 cup whole milk (or half n half/heavy cream)
2 eggs
1 tsp vanilla
1 tsp freshly grated lemon zest
1 cup of fresh raspberries
honey (or syrup)

Whisk together the dry ingredients in one bowl. In a separate bowl whisk together the rest of the ingredients. Add wet ingredients to dry ingredients and mix until combined.
Melt a tablespoon of butter (or olive oil) into your pan on medium-high heat. Ladle about 1/3 cup of batter into the pan. You should be able to make about three at a time, or depending on the size of pancakes you prefer. Cook until the edges start to bubble and brown, then flip. Cook for another two minutes and your pancakes should be ready to go!
I've been topping my pancakes with honey lately, so much healthier and quite delicious. This Saturday morning I actually had a fancy honey left over from Thanksgiving...orange blossom honey. It was divine on my pancakes. Plus the sour cream makes the batter incredibly fluffy. Hope you enjoy!
The next recipe is a snack fit for a queen by the roaring fire, friends gathered around the firepit outside or a couple cuddled on the couch. An avant-garde cheese plate.
Classique assiette de fromage (Classic Cheese Plate)
Ingredients:
1 bunch of red grapes
1 bunch of green grapes
1 bunch of purple grapes
a handful of fresh or dried figs
2-3 different kinds of cheese
honey
1 pear
1 apple
crackers
 You really can put anything on your cheese plate. It just depends on what you prefer to snack on. I am in love with cheese. So I chose a smoked gouda and a Havarti cheese for my plate. I sliced these cheeses up and placed them on a pretty glass cake stand as my plate. Then I sliced my pear, apple and figs and placed them on the plate. Next was washing and placing the grapes in bunches on the plate, along with the crackers of your choice. The last addition was to ladle a bit of honey near the figs onto your cheese plate. You can use any kind of honey, to make this a little more special try a blossom honey, mine was an orange blossom honey and it was superb. Then serve! Trust me, this snack will be gone in no time.
My next recipe to share on a cold, blustery day would be my warm orange zest biscuits with a variety of toppings and a cup of tea.
Orange Zest Biscuits
Ingredients:
2 cups flour
2 Tbsp sugar
2 tsp baking powder
1 tsp salt
1/4 tsp baking soda
2 Tbsp cold cubed butter
2 Tbsp cold pieces of cream cheese
1 Tbsp orange zest
1 cup whole milk (or heavy cream)

Preheat oven to 400 degrees. In a large bowl combine dry ingredients. Add cold butter, cream cheese and zest, use fork to combine. Should turn into small pea sized crumbles. Add milk and mix until combined. Make a ball of the dough and flatten, wrap in plastic wrap and let this sit in the fridge for about 15 minutes. After the dough has set, flour your surface and roll out the dough with your rolling pin (or take the easy way and lightly push it out with your hands) make as thin as you prefer. Then use your biscuit cutters or a simple cup and cut out your biscuits. Place on a baking sheet lined with aluminum or parchment paper. Bake for 10 minutes and you'll pretty much want to eat these right away. To serve I set out pumpkin butter, apple butter, sour cherry preserves and creamed honey. You can top with anything you like or even simply butter. Out of all these options...my favorite was the pumpkin butter...but creamed honey topped with sour cherry preserves came in as a close second. Pour a hot cup of tea or coffee and se faire plaisir! (Enjoy yourself!)
My last recipe for the chilly day would be my pumpkin chocolate cake topped with slivered almonds. For some reason baking is one of the best things I like to do when it's cold or when I'm stuck inside. Hence the yummy cake!
Pumpkin-Chocolate Cake
Ingredients:
3 cups flour
1 1/2 tsp baking soda
1/2 tsp salt
3/4 cup butter, softened
2 cups sugar
3 large eggs
1 Tbsp vanilla
1 (15 oz) can pumpkin puree
1/4 cup vegetable oil
1 cup whole milk
1/2 cup slivered almonds

Preheat oven to 300 degrees. Grease two 8 inch round pans. In a medium bowl mix in flour, baking soda and salt. In a standing mixer/large bowl, cream butter and sugar until light and fluffy. Beat in eggs, one at a time, then stir in vanilla, pumpkin and vegetable oil. Slowly add in the flour mixture and then slowly add in the milk. Divide batter evenly into pans. Bake 35-40 minutes or until a knife comes out clean when inserted in the center. Make or grab your frosting. Don't be too disappointed, but I didn't make my frosting this time. (I'm still perfecting my baking skills.) I used chocolate frosting and to fancy up the cake a bit I used slivered almonds for the top. Once the cake was cool, I frosted and topped with the almonds. And voila! Enjoy while the cake is still warm.
Hope you enjoyed all my recipes! Please leave any commentary about recipes you tried. xo Lo
This particular morning I looked in my fridge and had fresh raspberries, left over sour cream and honey. I decided to be brave and use all of these ingredients in my pancakes.
Raspberry Sour Cream Pancakes with Orange Blossom Honey
Ingredients:
1 1/2 cups flour
3 Tbsp sugar
2 tsp baking powder
1 1/2 tsp salt
1/2 cup sour cream
3/4 cup whole milk (or half n half/heavy cream)
2 eggs
1 tsp vanilla
1 tsp freshly grated lemon zest
1 cup of fresh raspberries
honey (or syrup)

Whisk together the dry ingredients in one bowl. In a separate bowl whisk together the rest of the ingredients. Add wet ingredients to dry ingredients and mix until combined.
Melt a tablespoon of butter (or olive oil) into your pan on medium-high heat. Ladle about 1/3 cup of batter into the pan. You should be able to make about three at a time, or depending on the size of pancakes you prefer. Cook until the edges start to bubble and brown, then flip. Cook for another two minutes and your pancakes should be ready to go!
I've been topping my pancakes with honey lately, so much healthier and quite delicious. This Saturday morning I actually had a fancy honey left over from Thanksgiving...orange blossom honey. It was divine on my pancakes. Plus the sour cream makes the batter incredibly fluffy. Hope you enjoy!
The next recipe is a snack fit for a queen by the roaring fire, friends gathered around the firepit outside or a couple cuddled on the couch. An avant-garde cheese plate.
Classique assiette de fromage (Classic Cheese Plate)
Ingredients:
1 bunch of red grapes
1 bunch of green grapes
1 bunch of purple grapes
a handful of fresh or dried figs
2-3 different kinds of cheese
honey
1 pear
1 apple
crackers

My next recipe to share on a cold, blustery day would be my warm orange zest biscuits with a variety of toppings and a cup of tea.
Orange Zest Biscuits
Ingredients:
2 cups flour
2 Tbsp sugar
2 tsp baking powder
1 tsp salt
1/4 tsp baking soda
2 Tbsp cold cubed butter
2 Tbsp cold pieces of cream cheese
1 Tbsp orange zest
1 cup whole milk (or heavy cream)

Preheat oven to 400 degrees. In a large bowl combine dry ingredients. Add cold butter, cream cheese and zest, use fork to combine. Should turn into small pea sized crumbles. Add milk and mix until combined. Make a ball of the dough and flatten, wrap in plastic wrap and let this sit in the fridge for about 15 minutes. After the dough has set, flour your surface and roll out the dough with your rolling pin (or take the easy way and lightly push it out with your hands) make as thin as you prefer. Then use your biscuit cutters or a simple cup and cut out your biscuits. Place on a baking sheet lined with aluminum or parchment paper. Bake for 10 minutes and you'll pretty much want to eat these right away. To serve I set out pumpkin butter, apple butter, sour cherry preserves and creamed honey. You can top with anything you like or even simply butter. Out of all these options...my favorite was the pumpkin butter...but creamed honey topped with sour cherry preserves came in as a close second. Pour a hot cup of tea or coffee and se faire plaisir! (Enjoy yourself!)
My last recipe for the chilly day would be my pumpkin chocolate cake topped with slivered almonds. For some reason baking is one of the best things I like to do when it's cold or when I'm stuck inside. Hence the yummy cake!
Pumpkin-Chocolate Cake
Ingredients:
3 cups flour
1 1/2 tsp baking soda
1/2 tsp salt
3/4 cup butter, softened
2 cups sugar
3 large eggs
1 Tbsp vanilla
1 (15 oz) can pumpkin puree
1/4 cup vegetable oil
1 cup whole milk
1/2 cup slivered almonds

Preheat oven to 300 degrees. Grease two 8 inch round pans. In a medium bowl mix in flour, baking soda and salt. In a standing mixer/large bowl, cream butter and sugar until light and fluffy. Beat in eggs, one at a time, then stir in vanilla, pumpkin and vegetable oil. Slowly add in the flour mixture and then slowly add in the milk. Divide batter evenly into pans. Bake 35-40 minutes or until a knife comes out clean when inserted in the center. Make or grab your frosting. Don't be too disappointed, but I didn't make my frosting this time. (I'm still perfecting my baking skills.) I used chocolate frosting and to fancy up the cake a bit I used slivered almonds for the top. Once the cake was cool, I frosted and topped with the almonds. And voila! Enjoy while the cake is still warm.
Hope you enjoyed all my recipes! Please leave any commentary about recipes you tried. xo Lo
Friday, August 16, 2013
Wonton a delicious dinner? Try some dim sum.
My mom bought one of those bamboo steamers for making wontons or any sort of dumpling. She was excited to try out a recipe so we gathered our supplies and got to work.
 Pork and Cabbage Dim Sum:
1/2 pound ground pork
2 garlic cloves
1 Tbsp grated fresh ginger
2 egg whites
1/2 lemon juiced
1 Tbsp low sodium soy sauce
1 Tbsp sesame oil
1 package of wonton wrappers
savoy cabbage
 Mix the filling together, make sure it is all mixed. Take a wonton wrapper, put about a tablespoon of pork mixture into the wrappers then dip your finger into some water and outline the edge of the wrapper with the water. Then use that to seal the dumpling together. Pull up to opposite corners and seal, then pull the opposite corners and seal.
 Then on the bottom of each layer cover with a few pieces of savoy cabbage. Continue with the dim sum and place them on top of the cabbage leaves. Then for those who prefer a gluten-free option can use some savoy cabbage leaves as the wonton wrappers. Simply place a tablespoon of mixture in the center of the cooked cabbage and wrap up using the sides like a burrito. Fill up the bamboo steamer basket with one layer only. Bring one to two inches of water in a pot to boil and place steamer on top. Steam for 10-12 minutes. Serve with soy sauce!

Three Bean Salad
1 can kidney beans
1 can cannellini beans
1 can black beans
1 small package of frozen peas
1 Tbsp sesame oil
1 tsp salt
1 tsp pepper
For an easy, delicious protein packed side dish we mixed together a variety of beans (you can use whatever you have on hand) added in some sesame oil to keep in the Asian flair and of course salt and pepper. Let marry in the fridge before serving.
I hope you enjoy this meal as much as my mom and I did. It was fabulous! xoxo Lo

1/2 pound ground pork
2 garlic cloves
1 Tbsp grated fresh ginger
2 egg whites
1/2 lemon juiced
1 Tbsp low sodium soy sauce
1 Tbsp sesame oil
1 package of wonton wrappers
savoy cabbage
 Mix the filling together, make sure it is all mixed. Take a wonton wrapper, put about a tablespoon of pork mixture into the wrappers then dip your finger into some water and outline the edge of the wrapper with the water. Then use that to seal the dumpling together. Pull up to opposite corners and seal, then pull the opposite corners and seal.
  Then on the bottom of each layer cover with a few pieces of savoy cabbage. Continue with the dim sum and place them on top of the cabbage leaves. Then for those who prefer a gluten-free option can use some savoy cabbage leaves as the wonton wrappers. Simply place a tablespoon of mixture in the center of the cooked cabbage and wrap up using the sides like a burrito. Fill up the bamboo steamer basket with one layer only. Bring one to two inches of water in a pot to boil and place steamer on top. Steam for 10-12 minutes. Serve with soy sauce!
Three Bean Salad
1 can kidney beans
1 can cannellini beans
1 can black beans
1 small package of frozen peas
1 Tbsp sesame oil
1 tsp salt
1 tsp pepper
For an easy, delicious protein packed side dish we mixed together a variety of beans (you can use whatever you have on hand) added in some sesame oil to keep in the Asian flair and of course salt and pepper. Let marry in the fridge before serving.
I hope you enjoy this meal as much as my mom and I did. It was fabulous! xoxo Lo
Subscribe to:
Posts (Atom)